Pedicure is one of those beauty treatments that combine pleasure with utility, so it's definitely worth doing. Importantly, you can perform this treatment yourself in the comfort of your own home. How to do it step by step to enjoy beautiful, well-groomed feet? What is a milling pedicure? Find out more!
What is a milling pedicure?
Pedicure is a treatment performed on the toenails and feet, aimed at improving their appearance and condition. A unique type of pedicure is a milling pedicure, as the name suggests, performed using a milling machine. This, in turn, is much more than just an electric file. The wide availability of interchangeable milling bits, attachments, and caps makes it a multifunctional device, with which you can easily work not only on the nail plate but also on cuticles and skin, removing dead skin, unsightly calluses, smoothing the tips of the toes and soles of the feet.
The use of the aforementioned milling machine distinguishes the milling pedicure from the traditional one. In the classic version of the treatment, paper files, polishing blocks, wooden sticks for pushing back cuticles, scissors, and clippers are used. It's worth mentioning that there are also other types of pedicures such as a biological pedicure, where no metal accessories are used at all, and a podiatric pedicure, also known as medical pedicure.

Advantages and disadvantages of a milling pedicure
Pedicure, regardless of the type, brings many benefits as it improves the appearance and condition of the nails and feet and supports their health. Regular and properly conducted pedicures prevent ailments such as:
- Ingrown toenails
- Formation of calluses and corns
- Dry skin
- Painful cracking of the skin on the heels, which can lead to inflammation.
The procedure conducted using the milling machine has even more advantages. First of all, it takes much less time than a traditional pedicure and doesn't strain the hand to the same extent. Professional nail stylists in beauty salons readily appreciate this huge time savings and comfort, which is why they eagerly opt for the solution of a milling pedicure.
The procedure using this equipment, thanks to interchangeable milling bits of various shapes, sizes, and gradations, is also much more precise. So, does it have any drawbacks?
If you want to perform a milling pedicure at home and you don't have a milling machine, of course, you have to invest in one. This is a cost that will quickly pay off when you regularly do pedicures! Additionally, you can use this equipment to do a manicure. Although using a milling machine is relatively easy and intuitive, you need to "befriend" it and practice a bit. Improper use of it can lead to skin or nail damage, so the first attempts should be very careful.
When to choose a milling pedicure?
A milling pedicure is a fantastic care treatment that is definitely worth choosing when you want to quickly, precisely, and with minimal effort improve the appearance of your feet. It is especially recommended for large calluses and very hard nails, which take a lot of time to file with a traditional file.

How to do a milling pedicure step by step?
Start the procedure by removing the calluses from the surface of the heels. If they are heavily calloused and the skin is tough, reach for special pads with a grit of 80. For removing delicate calluses from the surface of the heels, you can use pads with a grit of 180. Also, remember to always smooth the surface worked with a grit of 180 with a grit of 80. Then, if necessary, work on the skin on the arch and toes.
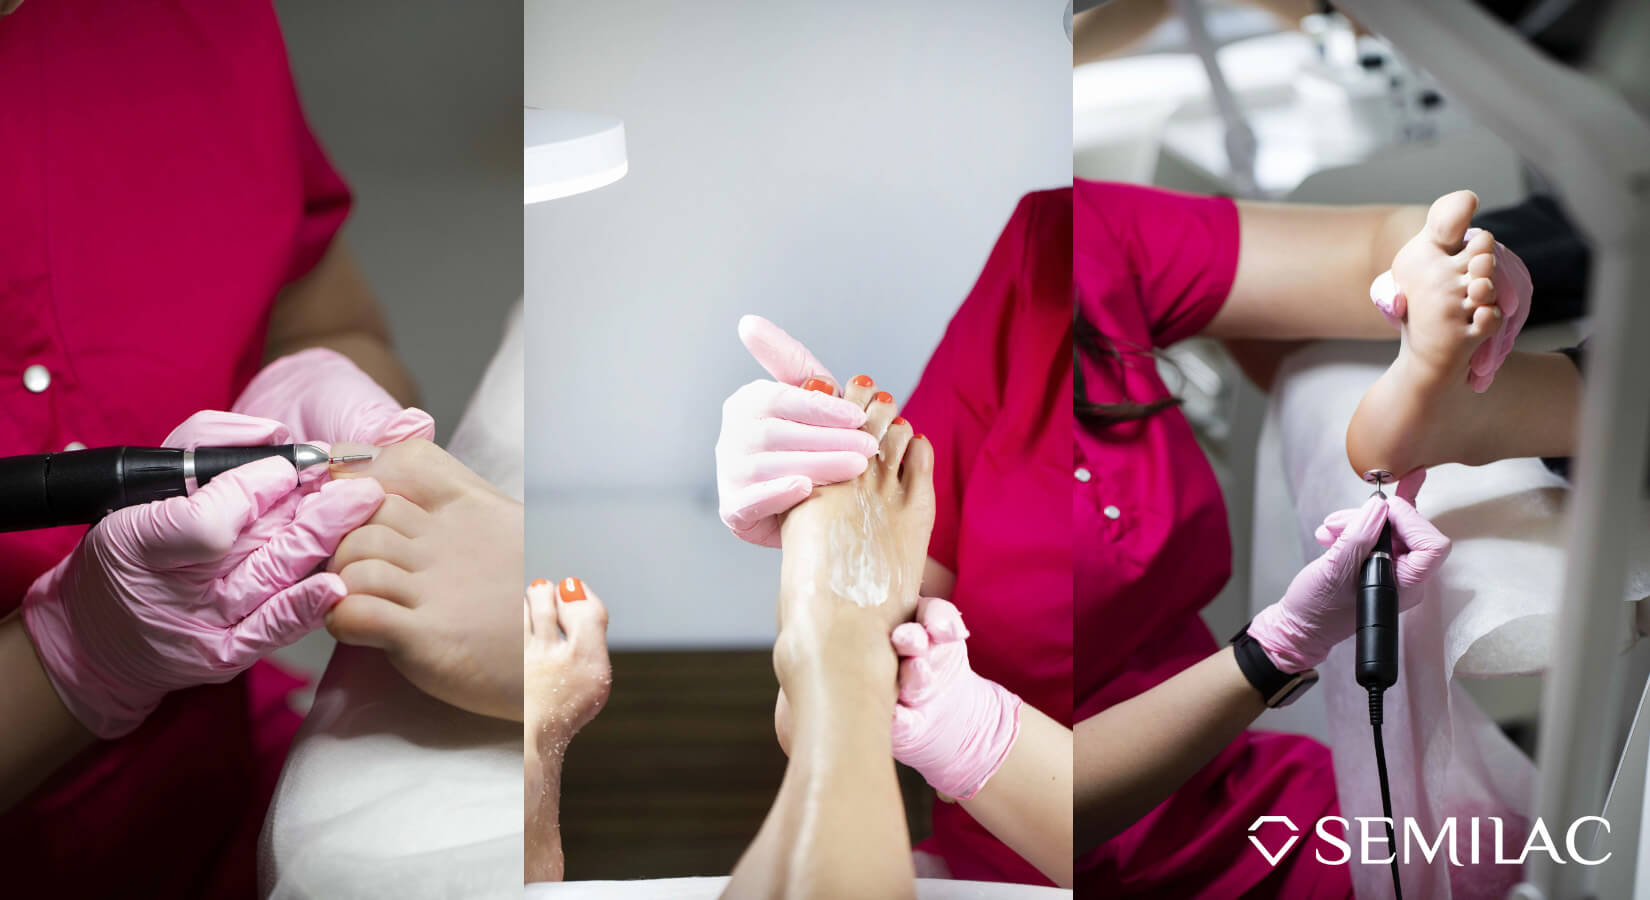
Now it's time for cuticles. Work on the skin around the nails. If the cuticles are heavily overgrown and need to be cut, you can push them back and lift them with the help of a diamond drill bit 005 Semilac in the shape of a cut spike. A great option for removing and smoothing cuticles is also a delicate drill bit 013 in the shape of a ball - an excellent proposition for novice pedicure enthusiasts. A very important step that affects the final appearance and durability of the pedicure is cleaning the nail plate from the cuticle. Use a precision drill bit 012 with a medium grit diamond coating in the shape of a flame for this purpose.
The next step is to work on the nail plate. Shorten it so that it does not protrude beyond the tips of the toes. This is extremely important for toenails! Remove any unevenness and smooth the entire nail plate. If you don't want to paint your nails, you can finish the treatment with a foot peel and a relaxing bath. After that, to complete the foot care, apply a moisturizing and nourishing cream to the skin. You can also use a nail conditioner and/or a regenerating cuticle oil.
If you decide to apply colour, it's worth doing a UV gel nail pedicure. UV gel nail polish is much more durable than its traditional counterpart and stays in perfect condition for up to three weeks!
Safety during the procedure is essential, so remember a few rules:
- Perform all activities with the milling machine dry - soaked skin around the nails and heels will roll, and nails themselves should not be cut or filed when wet, as they are much more prone to damage;
- If you want to do a relaxing foot bath, do it much earlier, so that the skin and nails are perfectly dry before starting the treatment, or after completing the pedicure;
- When working on the skin of the heels with the milling machine, make short, smooth, and even movements, do not press the device against the skin to avoid damaging it and causing a burning sensation;
- The same principle applies to working on the nail plate - holding the drill bit in one place for a long time carries the risk of damage;
- Gradually increase the speed to "feel" the action of the milling machine and its power;
- Ensure good, stable support for the foot and proper lighting.
Use these tips to make your first pedicure truly successful. Also, remember to keep all accessories in impeccable cleanliness and regularly check their condition. Contraindications for performing pedicures in the comfort of your home include conditions such as, among others, foot and nail fungus, ingrown toenails, severely cracked skin. These are indications for a visit to a podiatrist and a therapeutic pedicure.

Home Pedicure - Summary
You now know what a pedicure is and how to do it step by step at home. Is it worth it? Absolutely. It's a unique opportunity not only to improve the appearance and health of your feet but also to have a moment of relaxation just for yourself or to enjoy spending time with your best friend!